Friday, September 23, 2016

This tutorial is written for those with knowledge of PSP
Supplies Needed:
Tube of choice: I'm using the wonderful art work of Arthur Crowe
You must obtain a license to use HERE
PTU Scrapkit from Creation by Sanie HERE
Kit and tube can be purchased together or separate
Mask of choice
Ok Lets get Started:
Resize elements to your liking
This is a very quick and easy tutorial
Open blank canvas 700x700
Open element 29 & place to center
Click inside with magic wand & expand by 10
Open paper 9 and paste as new layer
Selections invert delete
Move paper under frame
Place your tube & build around it
Now time to add our elements
I used the following:
Element 1
Element 3
Element 7
Element 12
Element 13
Element 14
Element 15
Element 20
Element 22
Element 23
Element 24
Element 30
Merge layers
Open paper of choice and apply mask
Place your name where you like it
Add the Copyright and your License Number for the tube
Resize to your liking and save as PNG
This tutorial was created on September 23,2016 by Rhonda
Any resemblance to another Tag or Tutorial is purely coincidental

This tutorial is written for those with knowledge of PSP
Supplies Needed:
Tube of choice: I'm using the wonderful art work of Ismael Rac
This tube was a free gift at his store
You can find his art now at SNC HERE
FTU Scrapkit from Dreamland Designs HERE
Mask of choice
Ok Lets get Started:
Resize elements to your liking
This is a very quick and easy tutorial
Open blank canvas 700x700
Open frame 2 & place to center
I made another frame using a darker color pink with noise
Click inside with magic wand & expand by 10
Open paper 17 and paste as new layer
Selections invert delete
Move paper under frame
Place your tube & build around it
Now time to add our elements
I used the following:
Dreamland Ribbon
Ribbon
Floral Ribbon
Tag 2
Tag 1
Time for a Cure
Butterfly
Merge layers
Open paper of choice and apply mask
Place your name where you like it
Add the Copyright and your License Number for the tube
Resize to your liking and save as PNG
This tutorial was created on September 23,2016 by Rhonda
Any resemblance to another Tag or Tutorial is purely coincidental

This tutorial is written for those with knowledge of PSP
Supplies Needed:
Tube of choice: I'm using the wonderful art work of Arthur Crowe
Which you must obtain a license to use HERE
FTU Scrapkit by Melissaz Creationz HERE
Template #37 by Rachel Designs HERE
Mask #13 by Angie Tagged Me HERE
Ok Lets get Started:
Open template - Shift D to duplicate then close out original
Resize template to your liking
Delete copyright & word art
Click on layer 1 selections,select all, float,defloat
paste a paper of choice from the kit - I used paper7
selection invert delete
select none delete the original
apply Filters Unliminted Hemp Paper 1
Click on layer 2 selections,select all, float,defloat
paste a paper of choice from the kit - I used paper10
selection invert delete
select none delete the original
apply Filters Unliminted Hemp Paper 1
Click on layers 3&4 selections,select all, float,defloat
paste a paper of choice from the kit - I used paper8
selection invert delete
select none delete the original
Click on layer 6 selections,select all, float,defloat
paste a paper of choice from the kit - I used paper2
selection invert delete
select none delete the original
Click on layers 7&8 selections,select all, float,defloat
paste a paper of choice from the kit - I used paper1
selection invert delete
select none delete the original
apply Filters Unliminted Hemp Paper 1
Click on layer 9 selections,select all, float,defloat
paste a paper of choice from the kit - I used paper4
selection invert delete
select none delete the original
Place your tube
Now time to add our elements
I used the following:
Cluster
Element 1
Element 5
Element 7
Element 9
Element 18
Element 20
Element 21
Element 22
Element 24
Element 25
Element 26
Merge your layers
Open paper of choice and apply mask
Place your name where you like it
Add the Copyright and your License Number for the tube
Resize to your liking and save as PNG
This tutorial was created on September 23,2016 by Rhonda
Any resemblance to another Tag or Tutorial is purely coincidental
This tutorial is written for those with knowledge of PSP
Supplies Needed:
Tube of choice: Im using the wonderful art work of Danny Lee
Which you must obtain a license to use at SNC HERE
PTU Scrapkit by Rieneke Designs purchased at SNC HERE
Template #671 by Millie HERE
Mask of choice
Ok Lets get Started:
Open template - Shift D to duplicate then close out original
Delete copyright
Click on layer 1 selections,select all, float,defloat
paste a paper of choice from the kit - I used paper2
selection invert delete
select none delete the original
add border with noise
Click on layer 2&3 selections,select all, float,defloat
paste a paper of choice from the kit - I used paper4
selection invert delete
select none delete the original
add border with noise
Click on layer 4 selections,select all, float,defloat
paste a paper of choice from the kit - I used paper3
selection invert delete
select none delete the original
add bordr with noise
Click on layer 5 selections,select all, float,defloat
paste a paper of choice from the kit - I used paper9
selection invert delete
select none delete the original
add border with noise
Click on layers 6&8 selections,select all, float,defloat
paste close-up of tube inside square
selection invert delete
select none delete the original
apply PhotoEffex with settings of choice
add border with noise
Click on layer 7 selections,select all, float,defloat
paste a paper of choice from the kit - I used paper1
selection invert delete
select none delete the original
add border with noise
I used fall gradients for the word art with noise
Place your tube
Now time to add our elements
I used the following:
Element 6
Element 14
Element 16
Element 17
Element 18
Element 27
Element 31
Element 32
Element 33
Element 34
Element 38
Element 39
Element 40
Element 41
Element 43
Element 44
Element 45
Element 47
Element 50
Merge your layers
Open paper of choice and apply mask
Place your name where you like it
Add the Copyright and your License Number for the tube
Resize to your liking and save as PNG
This tutorial was created on September 23,2016 by Rhonda
Any resemblance to another Tag or Tutorial is purely coincidental
This tutorial is written for those with knowledge of PSP
Supplies Needed:
Tube of choice: I'm using the wonderful art work of Kajenna
You must obtain a license to use at PFD HERE
PTU Scrap Kit by Purple Dreams Scraps called Autumn Day HERE
Template #387 by Missy HERE
Mask #27 & 28 by Ria's PSP Paradise HERE
Ok Lets get Started:
Open template - Shift D to duplicate then close out original
Increase canvas size to 700x700
Delete copyright,word art, thin rectangle, dotted line & circles
Click on small circles selections,select all, float,defloat
paste a paper of choice from the kit - I used paper7
selection invert delete
select none delete the original
Click on rectangle selections,select all, float,defloat
paste a paper of choice from the kit - I used paper10
selection invert delete
select none delete the original
add border with noise
Click on circle selections,select all, float,defloat
paste a paper of choice from the kit - I used paper6
selection invert delete
select none delete the original
Click on circle back selections,select all, float,defloat
paste a paper of choice from the kit - I used paper2
selection invert delete
select none delete the original
add noise with settings of choice
Click on circle2 selections,select all, float,defloat
paste a paper of choice from the kit - I used paper3
selection invert delete
select none delete the original
Click on frame back and copy of selections,select all, float,defloat
paste a paper of choice from the kit - I used paper4
selection invert delete
select none delete the original
Add close up of tube inside the frames
Change blend mode to Luminous
apply Penta filter with settings of choice
Click on frame and copy of selections,select all, float,defloat
paste a paper of choice from the kit - I used paper5
selection invert delete
select none delete the original
add noise with settings of choice
Place your tube
Now time to add our elements
I used the following:
Element 2
Element 8
Element 15
Element 16
Element 19
Element 22
Element 23
Element 24
Element 25
Element 28
Element 29
Element 30
Element 31
Element 61
Merge your layers
Open paper of choice and apply mask
Place your name where you like it
Add the Copyright and your License Number for the tube
Resize to your liking and save as PNG
This tutorial was created on September 23,2016 by Rhonda
Any resemblance to another Tag or Tutorial is purely coincidental
Friday, September 16, 2016

This tutorial is written for those with knowledge of PSP
Supplies Needed:
Tube of choice: Im using the wonderful art work of Maryline Cazerave
You must obtain a license to use at CDO HERE
PTU Scrapkit from Lemur Designs purchased at PFD HERE
Mask of choice
Ok Lets get Started:
Resize elements to your liking
This is a very quick and easy tutorial
Open blank canvas 700x700
Open element 99 & place in center of tag
Click inside frame with magic wand and expand by 10
Add new layer under frame and select all
Open paper 9 and paste into selection
Select none
Place tube to right hand side
Now time to add our elements
I used the following:
Element 2
Element 4
Element 5
Element 8
Element 12
Element 15
Element 17
Element 22
Element 23
Element 33
Element 37
Element 41
Element 63
Element 69
Element 72
Element 102
Element 116
Merge layers
Apply paper and mask of choice
Place your name where you like it
Add the Copyright and your License Number for the tube
Resize to your liking and save as PNG
This tutorial was created on September 16,2016 by Rhonda
Any resemblance to another Tag or Tutorial is purely coincidental
This tutorial is written for those with knowledge of PSP
Supplies Needed:
Tube of choice: Im using the wonderful art work of Anna Marine
Which you must obtain a license to use at CDO HERE
FTU Scrapkit by Gold Dust HERE
Template 141 by Scraps of Enchantment HERE
Mask of choice
Don't forget to leave a thank you when downloading
Ok Lets get Started:
Open template - Shift D to duplicate then close out original
Resize template to desired size
Delete copyright & chevrons
Click on frame selections,select all, float,defloat
add new layer & flood fill with solid color of choice
selection invert delete
select none delete the original
add noise with settings of choice
Click on back selections,select all, float,defloat
paste a paper of choice from the kit - I used paper11
selection invert delete
select none delete the original
Click on pink circle selections,select all, float,defloat
paste a paper of choice from the kit - I used paper13
selection invert delete
select none delete the original
Click on light blue rectangle selections,select all, float,defloat
paste a paper of choice from the kit - I used paper7
selection invert delete
select none delete the original
Click on grey rectangle selections,select all, float,defloat
paste a paper of choice from the kit - I used paper8
selection invert delete
select none delete the original
Click on black rectangle selections,select all, float,defloat
paste a paper of choice from the kit - I used paper1
selection invert delete
select none delete the original
Click on white rectangle selections,select all, float,defloat
paste a paper of choice from the kit - I used paper6
selection invert delete
select none delete the original
Place your tube
Now time to add our elements
I used the following:
Acorns 1&2
Apples 2
Bird
Corn
Crow 1
Deco
Flower Spray
Scatter 1,4&5
Leaf Cluster
Mushroom 1
Pine Comb 2
Pumpkin 1
Scarecrow 2
Squash 1&2
Tree 4
Wagon
Merge your layers
Open paper of choice and apply mask
Place your name where you like it
Add the Copyright and your License Number for the tube
Resize to your liking and save as PNG
This tutorial was created on September 16,2016 by Rhonda
Any resemblance to another Tag or Tutorial is purely coincidental

This tutorial is written for those with knowledge of PSP
Supplies Needed:
Tube of choice: I'm using the wonderful art work of Laguna
You must obtain a license to use tube at PFD HERE
FTU Scrapkit by Scrappy Bit of Fun HERE
Mask of choice
Ok Lets get Started:
This is a very quick and easy tutorial
Resize elements to your liking and don't forget to drop shadow
Open blank canvas 700x700
Draw a circle in middle of canvas to desired size
I used a paper from the kit for frame
Grab the magic wand & click inside frame
Selections modify expand by 10
Add new layer under frame
Open paper 20 & paste into selection
Select none
Open frame 6 and paste on top of frame you made
Place your tube
Now time to add our elements
I used the following:
Element 5
Element 6
Element 9
Birdhouse with grass
Blossom
Hay Bale
Oranges
Owl
Tree 2
Pumpkin Pickins Screen
Ribbon
Wagon Owl
Wagon Owl Apples
Merge your layers
Open paper of choice & apply mask
Place your name where you like it
Add the Copyright and your License Number for the tube
Resize to your liking and save as PNG
This tutorial was created on September 16,2016 by Rhonda

This tutorial is written for those with knowledge of PSP
Supplies Needed:
Tube of choice: I'm using the wonderful art work of Keith Garvey
This tube was purchased at PTE which has closed
You can purchase his tubes at his store HERE
FTU Scrap Kit by Addictive Pleasures HERE
Template #139 by Scraps of Enchantment HERE
Don't forget to leave a thank you when downloading
Ok Lets get Started:
Open template - Shift D to duplicate then close out original
Resize template to your liking
Canvas size 700x700
Delete copyright, top & bottom cube
Click on top & bottom shape selections,select all, float,defloat
paste a paper of choice from the kit - I used paper7
selection invert delete
select none delete the original
Click on top & bottom circle selections,select all, float,defloat
paste a paper of choice from the kit - I used paper3
selection invert delete
select none delete the original
Click on black rectangle selections,select all, float,defloat
paste a paper of choice from the kit - I used paper10
selection invert delete
select none delete the original
Paste close-up of tube inside rectangle
Change blend mode to setting of your choice
Click on white shape top & bottom selections,select all, float,defloat
paste a paper of choice from the kit - I used paper9
selection invert delete
select none delete the original
Click on stars and flood fill with gradient of choice
Decorate word art to your liking
Place your tube
Now add any other elements of choice
I used the following:
Chain 2
Guitar
Heart Trail
Music Notes
Music Notes 2
Ribbon 3
Sparkle
Sparkles
Merge your layers
Add paper and mask of choie
Place your name where you like it
Add the Copyright and your License Number for the tube
Resize to your liking and save as PNG
This tutorial was created on September 15,2016 by Rhonda
Any resemblance to another Tag or Tutorial is purely coincidental
Wednesday, September 7, 2016
This tutorial is written for those with knowledge of PSP
Supplies Needed:
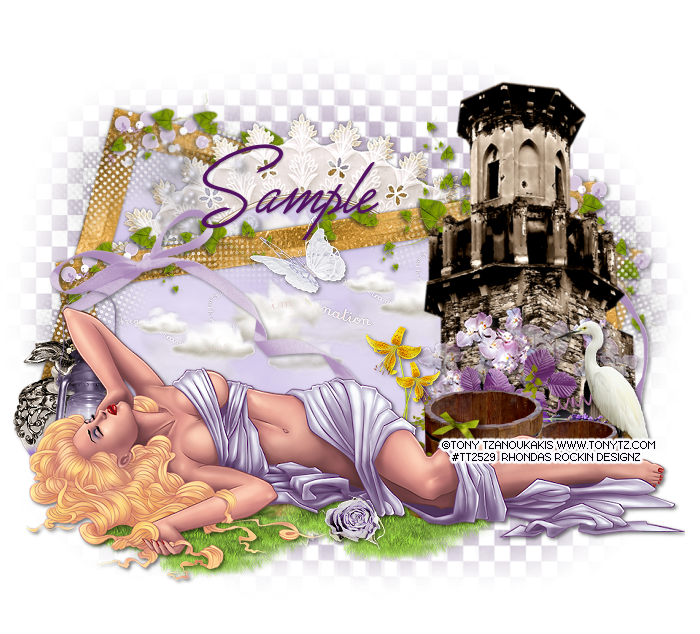
Tube of choice: I'm using the wonderful art work of Tony Tzanoukakis
You must obtain a license to use this art at his store HERE
Matching PTU Scrap Kit from Creations by Sanie also purchased at store HERE
Mask of choice
Ok Lets get Started:
Resize elements to your liking
This is a very quick and easy tutorial
Open blank canvas 700x700
Open element 14 & place in center of tag
Grab the magic wand & click inside frame
Selections modify expand by 10
Open new layer until frame
Open paper 1 and paste into selections
Select none
Merge the frame and paper as 1 layer
Duplicate and move the duplicated frame behind main frame and rotate
See my tag for example
Place your tube & build around it
Now time to add our elements
I used the following:
Element 1
Element 3
Element 5
Element 8
Element 11
Element 12
Element 13
Element 19
Element 20
Element 24
Element 26
Element 28
Element 29
Element 30
Element 31
Element 33
Element 34
Merge layers
Open paper of choice and apply mask
Place your name where you like it
Add the Copyright and your License Number for the tube
Resize to your liking and save as PNG
This tutorial was created on September 7,2016 by Rhonda
Any resemblance to another Tag or Tutorial is purely coincidental

This tutorial is written for those with knowledge of PSP
Supplies Needed:
Tube of choice: I'm using the wonderful art work of Tony Tzanoukakis
You must obtain a license to use this art at his store HERE
Matching PTU Scrap Kit from Reineke Designs also purchased at store HERE
Mask of choice
Ok Lets get Started:
Resize elements to your liking
This is a very quick and easy tutorial
Open blank canvas 700x700
Open element 22 & place in center of tag
Grab the magic wand & click inside frame
Selections modify expand by 10
Open new layer until frame
Open paper 6 and paste into selections
Select none
Place your main tube & build around it
Now time to add our elements
I used the following:
Element 1
Element 4
Element 6
Element 9
Element 10
Element 25
Element 30
Element 34
Element 35
Merge layers
Open paper of choice and apply mask
Place your name where you like it
Add the Copyright and your License Number for the tube
Resize to your liking and save as PNG
This tutorial was created on September 7,2016 by Rhonda
Any resemblance to another Tag or Tutorial is purely coincidental
Tuesday, September 6, 2016
This tutorial is written for those with knowledge of PSP
Supplies Needed:
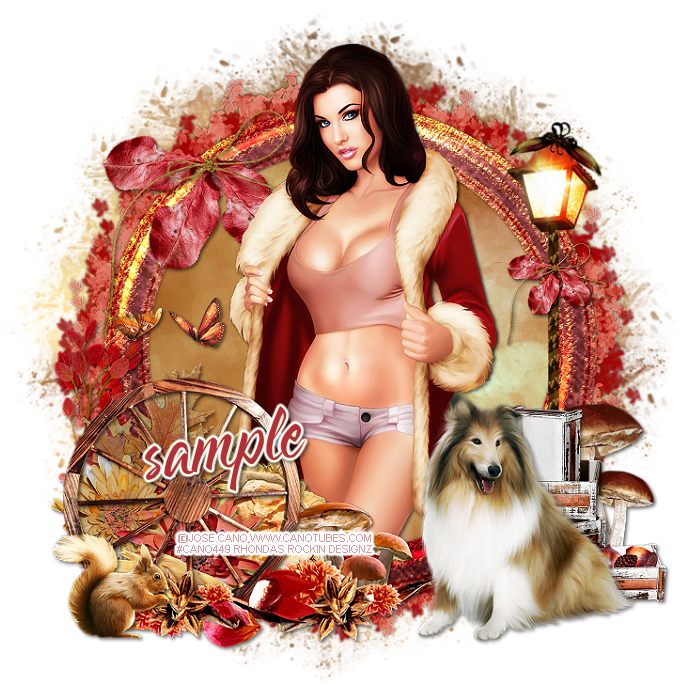
Tube of choice: I'm using the wonderful art work of Jose Cano called Natasha
You must obtain a license to use his art HERE
PTU Scrap Kit by Kissing Kate to match tube also purchased at Cano store HERE
Mask of choice
Ok Lets get Started:
This is a very quick and easy tutorial
Resize elements to your liking
Open blank canvas 700x700
Open frame 2 & place in center of tag
Grab the magic wand & click inside frame
Selections modify expand by 10
Add new layer under frame
Open paper 9 & paste into selection
Select none
Open frame 2 and place behind frame 1
Place your tube
Now time to add our elements
I used the following:
Element 2
Element 9
Element 11
Element 12
Element 15
Element 16
Element 17
Element 20
Element 21
Element 27
Element 30
Element 31
Element 35
Element 36
Merge your layers
Open paper of choice & apply mask
Place your name where you like it
Add the Copyright and your License Number for the tube
Resize to your liking and save as PNG
This tutorial was created on September 6,2016 by Rhonda
Subscribe to:
Posts
(Atom)
Grab My Blinkie

I CT For


Blogs I Visit


